How to Storyboard a Comic Book
Storyboarding your comic book can help you nail down the story, saving time, money, and stress when you start inking your comic panels.
Whether they're into Marvel or manga, all comic book artists share a secret weapon: the storyboard. It's a vital part of making comics that'll help you get crystal clear on the storyline before you start sketching comic panels or crafting lettering.
. If you're working on your own comic or graphic novel, then spending time in the storyboarding phase with AI will be a huge advantage. It'll help you sort story ideas into a sensible flow, tweaking the pacing for maximum effect. Which means you'll see whether anything's missing – way before you get to the inking stage.
In this step-by-step tutorial, we'll show you how to go about creating a top-notch storyboard that'll take your comic strip to heady new heights. And we'll throw in a free storyboard template for good measure, too.
The Shortcut to Effective Storyboards.
Boords is an easy-to-use storyboarding tool to plan creative projects.
Get Started for FreeThe history of storyboarding
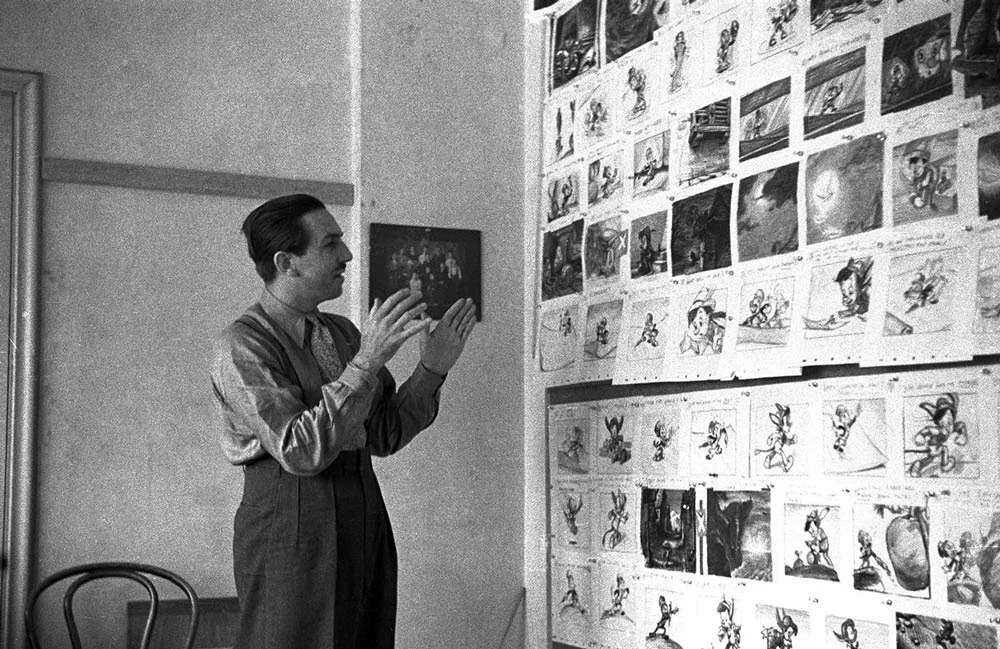
A storyboard is very similar to a graphic novel – it's a series of drawings accompanied by a little bit of text, where each drawing represents a specific part of the story. This visual story outline became popular in film production back in the 1930s thanks to the OG storyboard artist, Webb Smith, who turned it into something of an art form.
Smith, an animator at Walt Disney Studios, started drawing rough sketches of frames on different bits of paper, then stuck them up on a wall to communicate a sequence of events. You don't have to be working on an anime feature film to benefit from this kind of planning. Even smaller comic strips benefit from storyboarding.
Why it's important to storyboard your comic book
When your mind is buzzing with an idea, it can be tempting to dive into inking your comic panels. But, if you don't know where you're headed, you risk drawing yourself into a corner. As with everything in life, having a plan is going to make the whole process a lot easier. That's where storyboarding comes in.
Storyboarding is where you take your kernel of an idea and reproduce it in image form. You can use it to detail things like establishing shots (so that your readers know where you are) or close-ups (where you show an in-depth view of a person, object or situation). And lots of other things, too.
Make sure that each image on your storyboard contains enough information for people to understand what's going on, but not so much that it masks the most important details.
Three things to remember
- Your storyboard is like a rough outline of your graphic novel. You should dedicate each of the comic panels to an important moment in the story.
- The storyboarding process has two main goals: ensuring you have everything you need before you start inking and lettering, and doing it in an efficient way so that you don't have to spend time fixing things afterwards in Photoshop.
- A storyboard is every comic book artist's friend. It'll show you if you've missed some necessary details in the script, or if something only works in text but not visually.
How to storyboard a comic book
1. Set up your storyboard
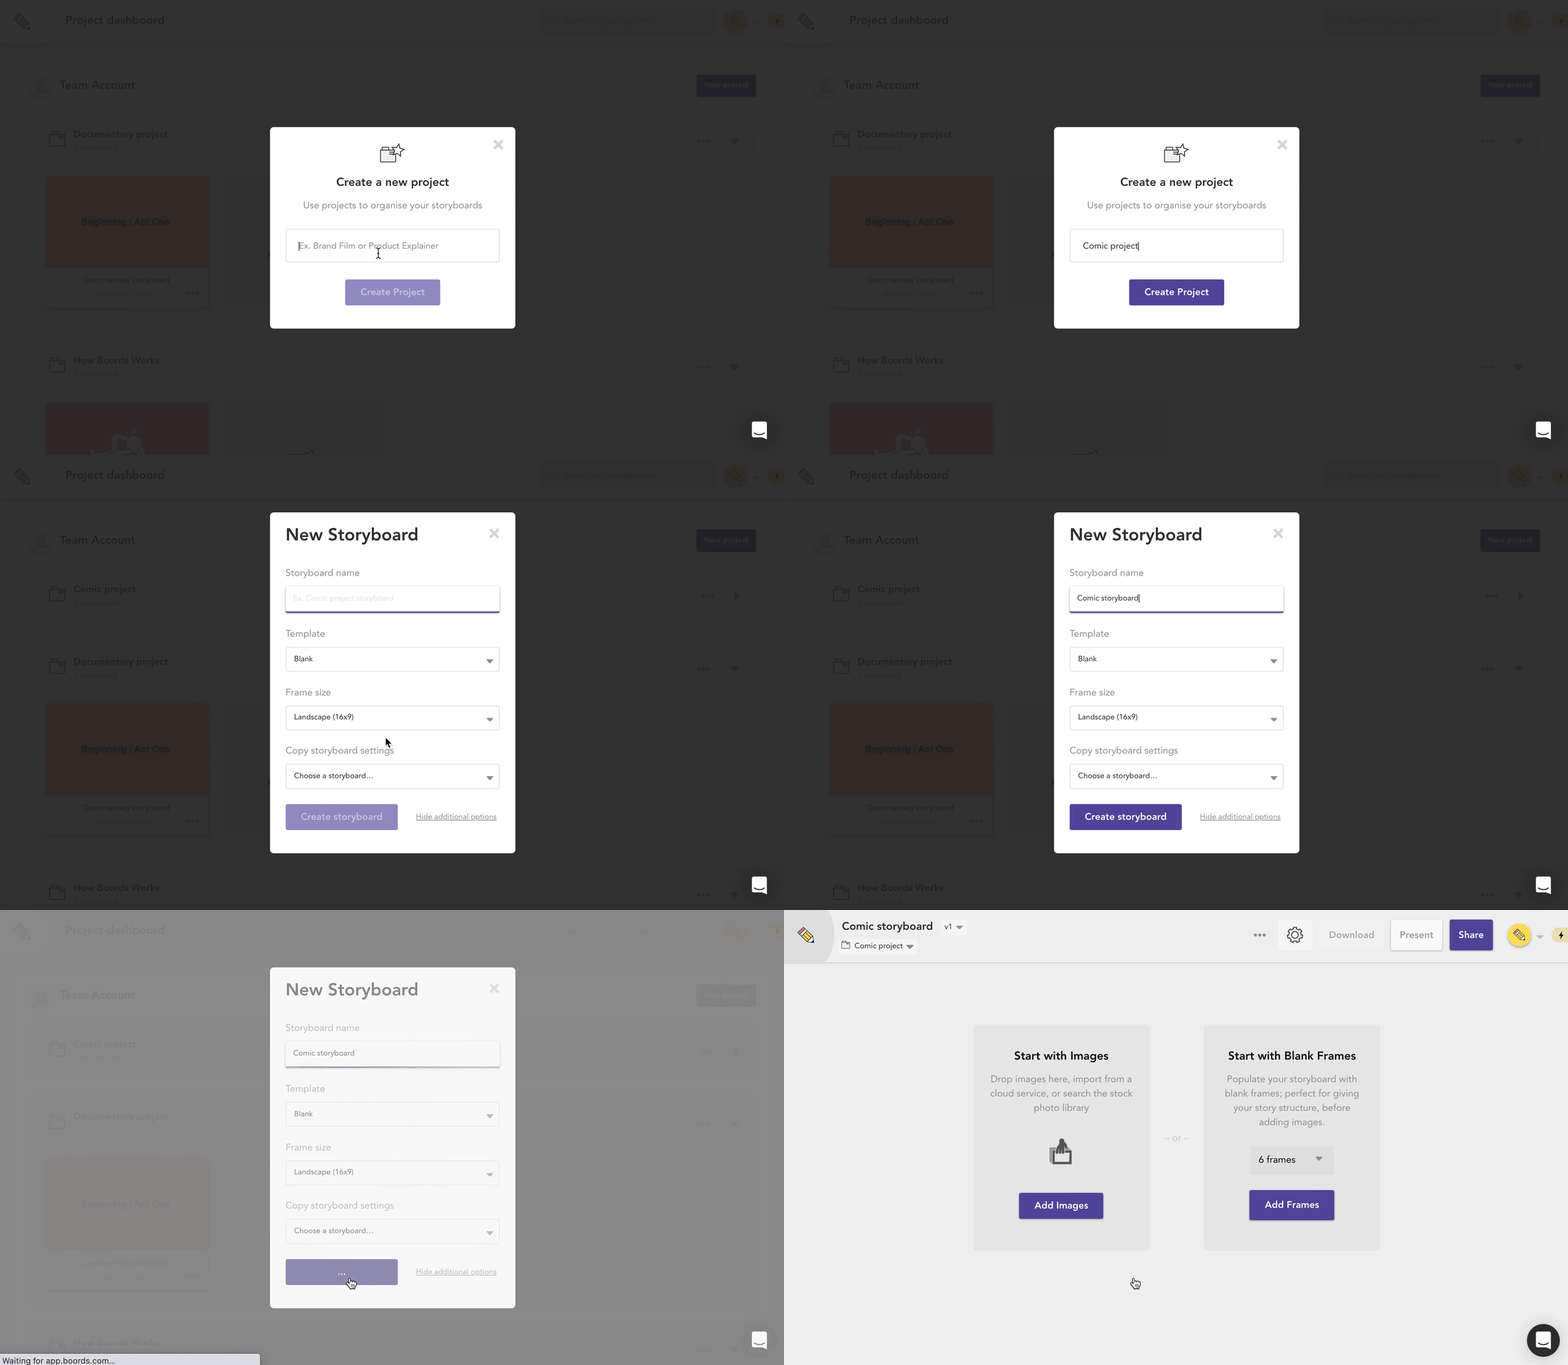
- Go to your Boords dashboard, click
New projectand name it after your comic - You'll be prompted to create a new storyboard – you can name that after your comic, too
- Click
Create storyboard
2. Customize your fields
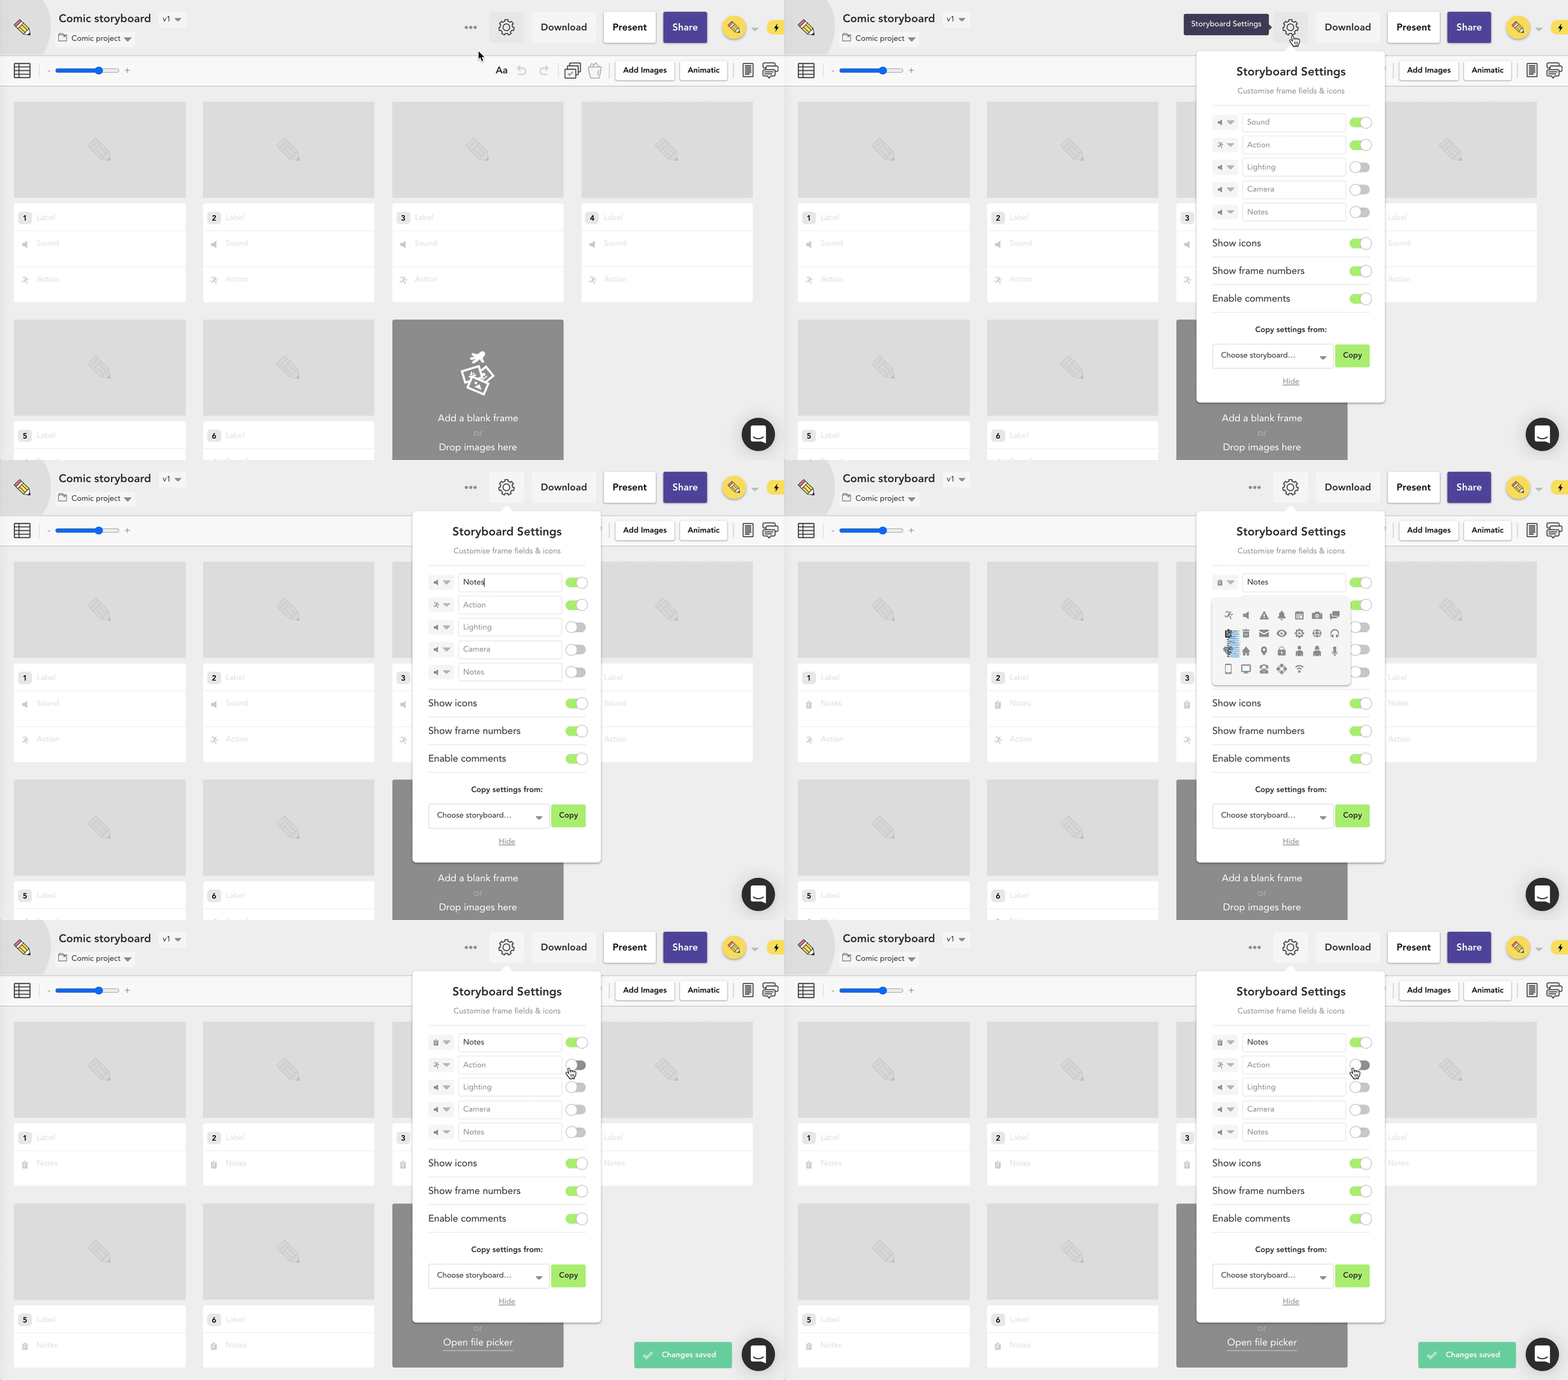
You can use custom fields to add extra information and keep all your ideas in one place. We recommend adding a Notes field and using a nifty custom icon.
- Click the settings cog to open the storyboard settings menu
- Use the toggle to turn off the default
SoundandActionfields - Add
Notesand any other new fields that'll be useful for your planning. For example, you might want to add a field about camera angle, sorting shots by: - Worm's eye (low) view to make your character seem powerful
- Eye level (regular) view for normal shots
- Bird's eye (high) view to make your character seem vulnerable
The Shortcut to Effective Storyboards.
Boords is an easy-to-use storyboarding tool to plan creative projects.
Get Started for Free3. Add a frame for each moment
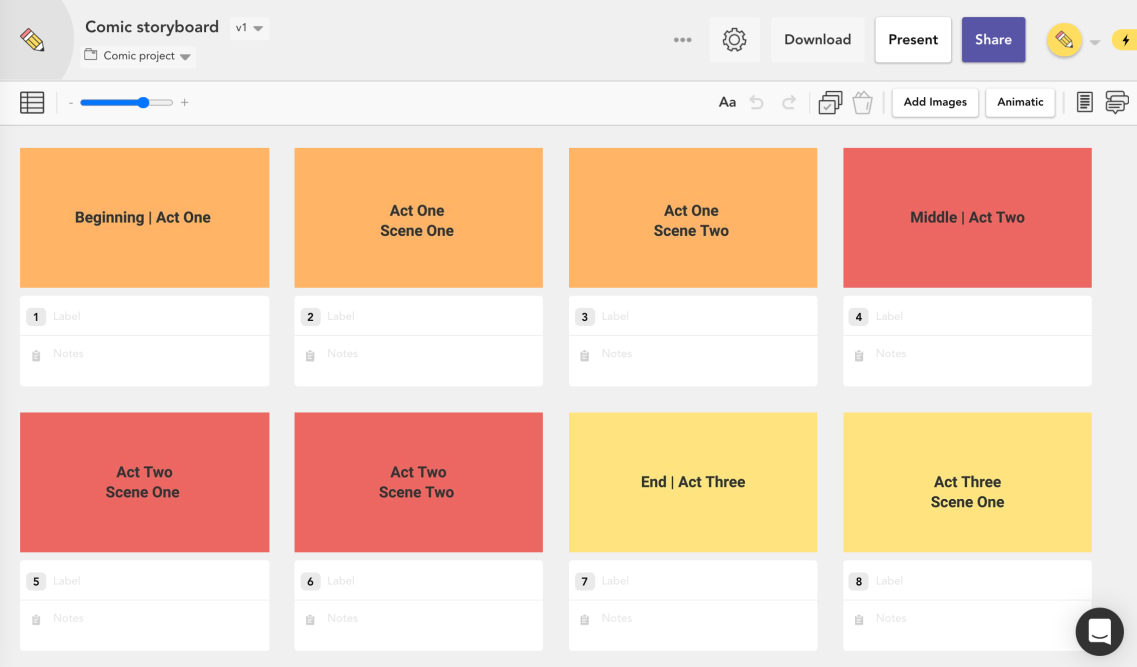
- Break up your storyline into important parts of the story, with a frame for each
- You can also use a new frame for each new camera angle
- Label each frame so you can understand it at a glance
4. Add illustrations
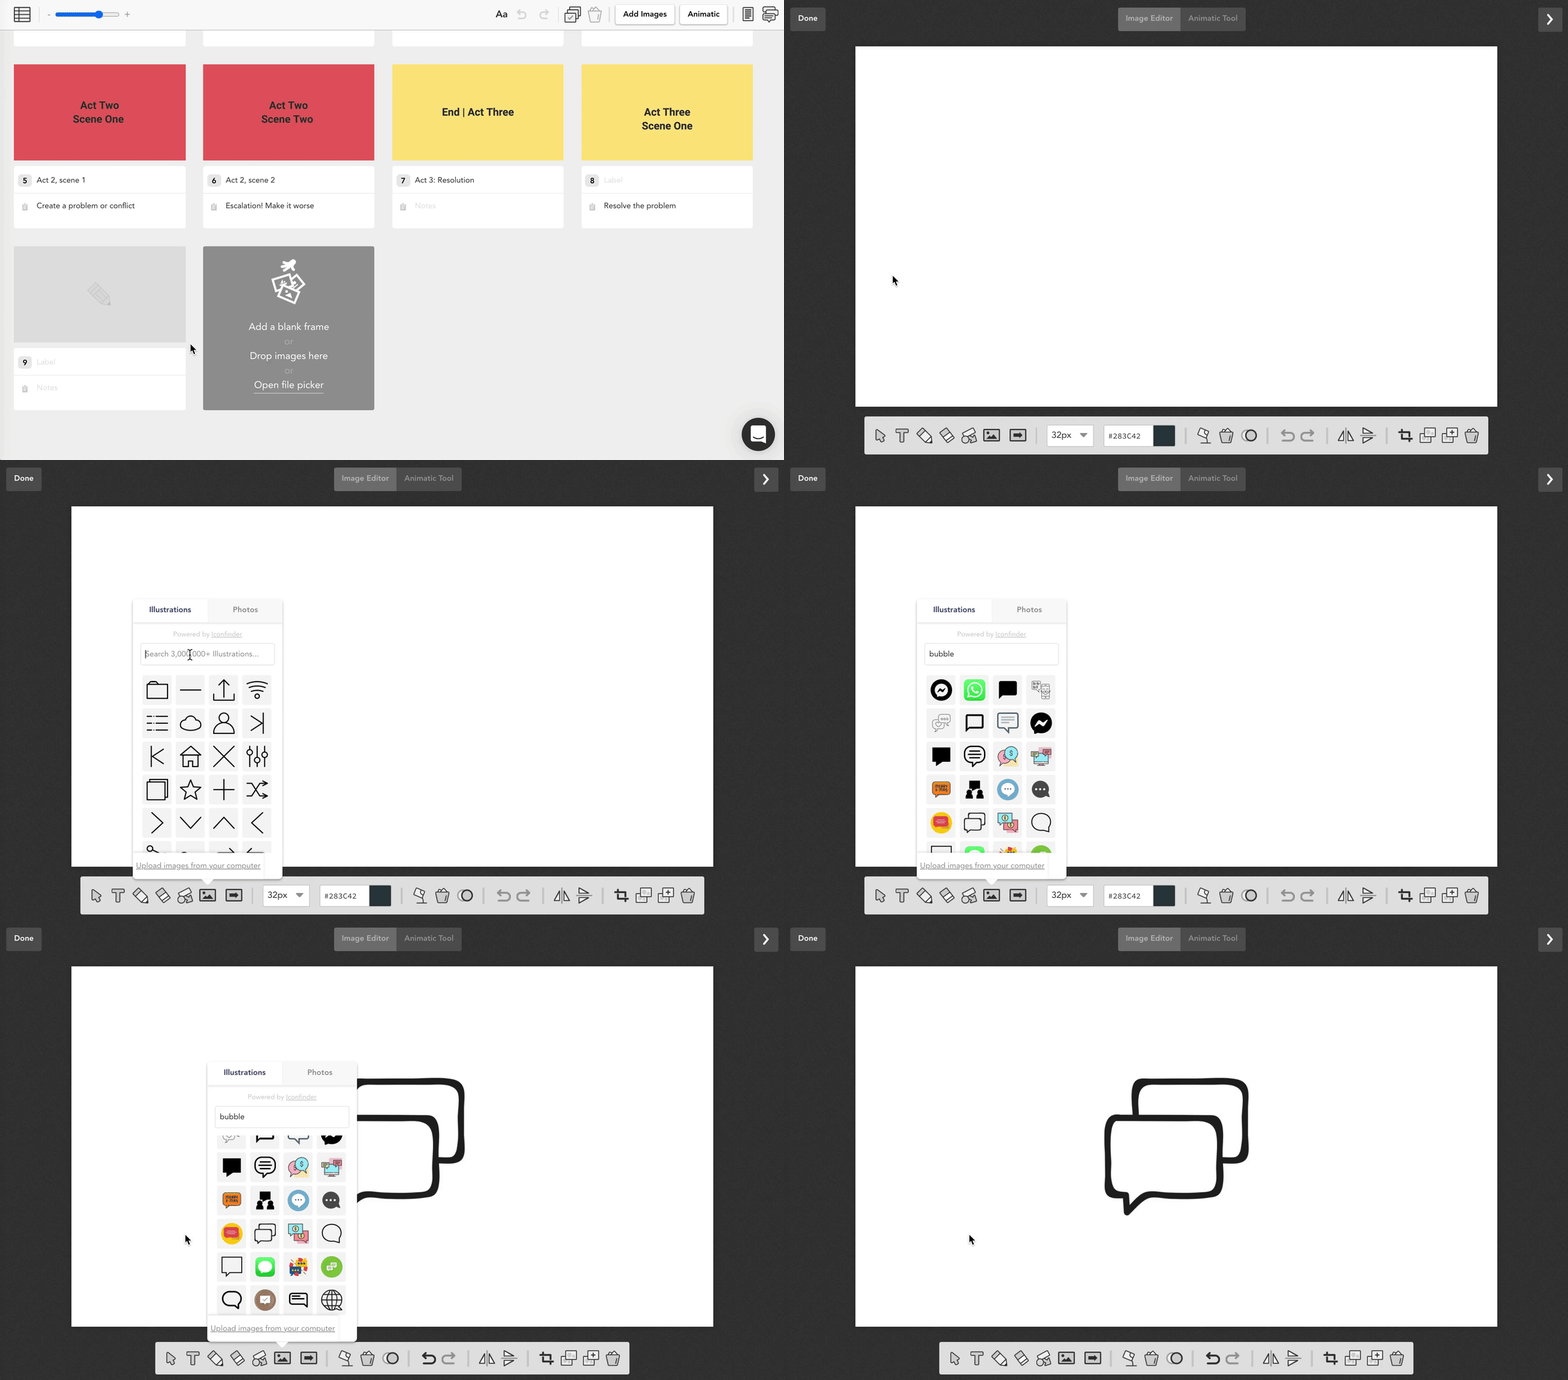
Add a simple illustration in each frame to help tell the story. Emphasise each moment, and think about how your character feels about it.
Your drawings don't need to be perfect at this stage – a sketch is fine. There's also a tonne of stock images and handy illustrations in Boords' image editor.
- Click
Edit image - Upload your own image, add a stock image or use the drawing tool to sketch
- Use thought bubbles to show what a character's thinking
At this stage, it'll be clear if your script's missing some important details, or if something only works in text but not visually. Feel free to go back and forth between sketching and writing to fix anything that's not quite right.
5. Add notes
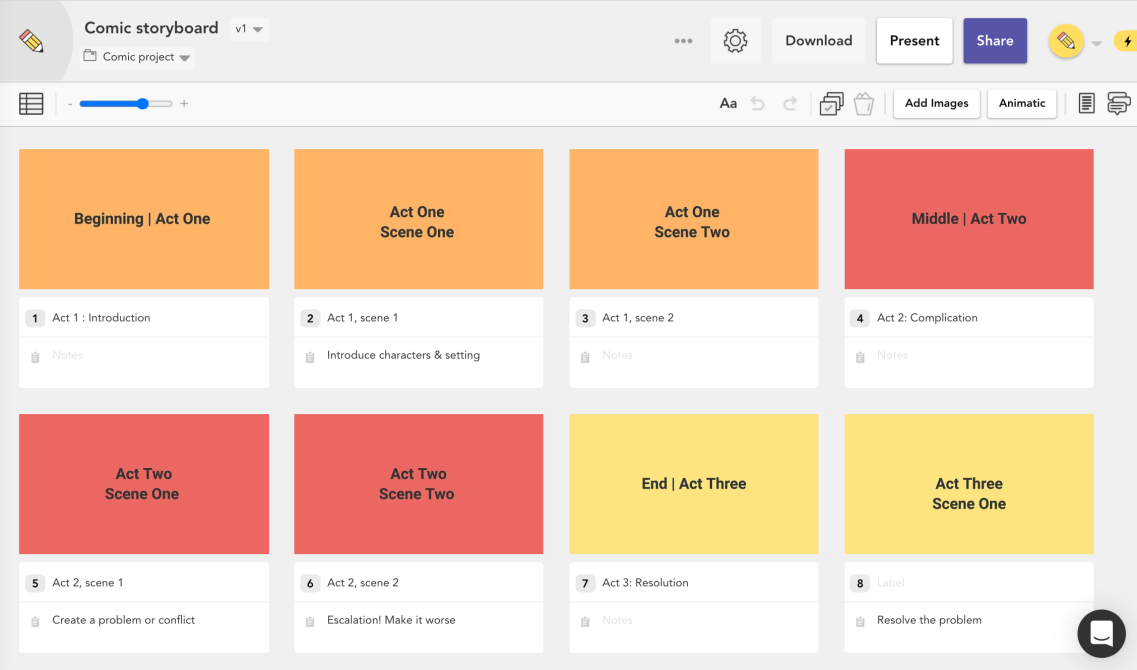
Leave more information in the Notes field of each frame to give more context. You can also show a character's thinking with thought bubbles.
6. Rearrange the frames
Now that you've got the entire story laid out, take a step back and check that everything flows correctly. Drag and drop frames if you need to tweak the order.
For strip comics, it's not unusual for your panels to look pretty similar, with just a couple of characters talking. So don't worry if that's the case.
If you're making a longer, narrative-focused comic, you may want to move the 'camera' around more. Mixing close-ups, full body shots and using the bird's/worm's eye view can create a lot of interest, even if it's just two characters talking to each other.
That said, it needs to be super clear at all times who's talking and what's happening. Don't vary the angles so much that readers get dizzy and can't understand who's talking or what's happening.
7. Create an animatic
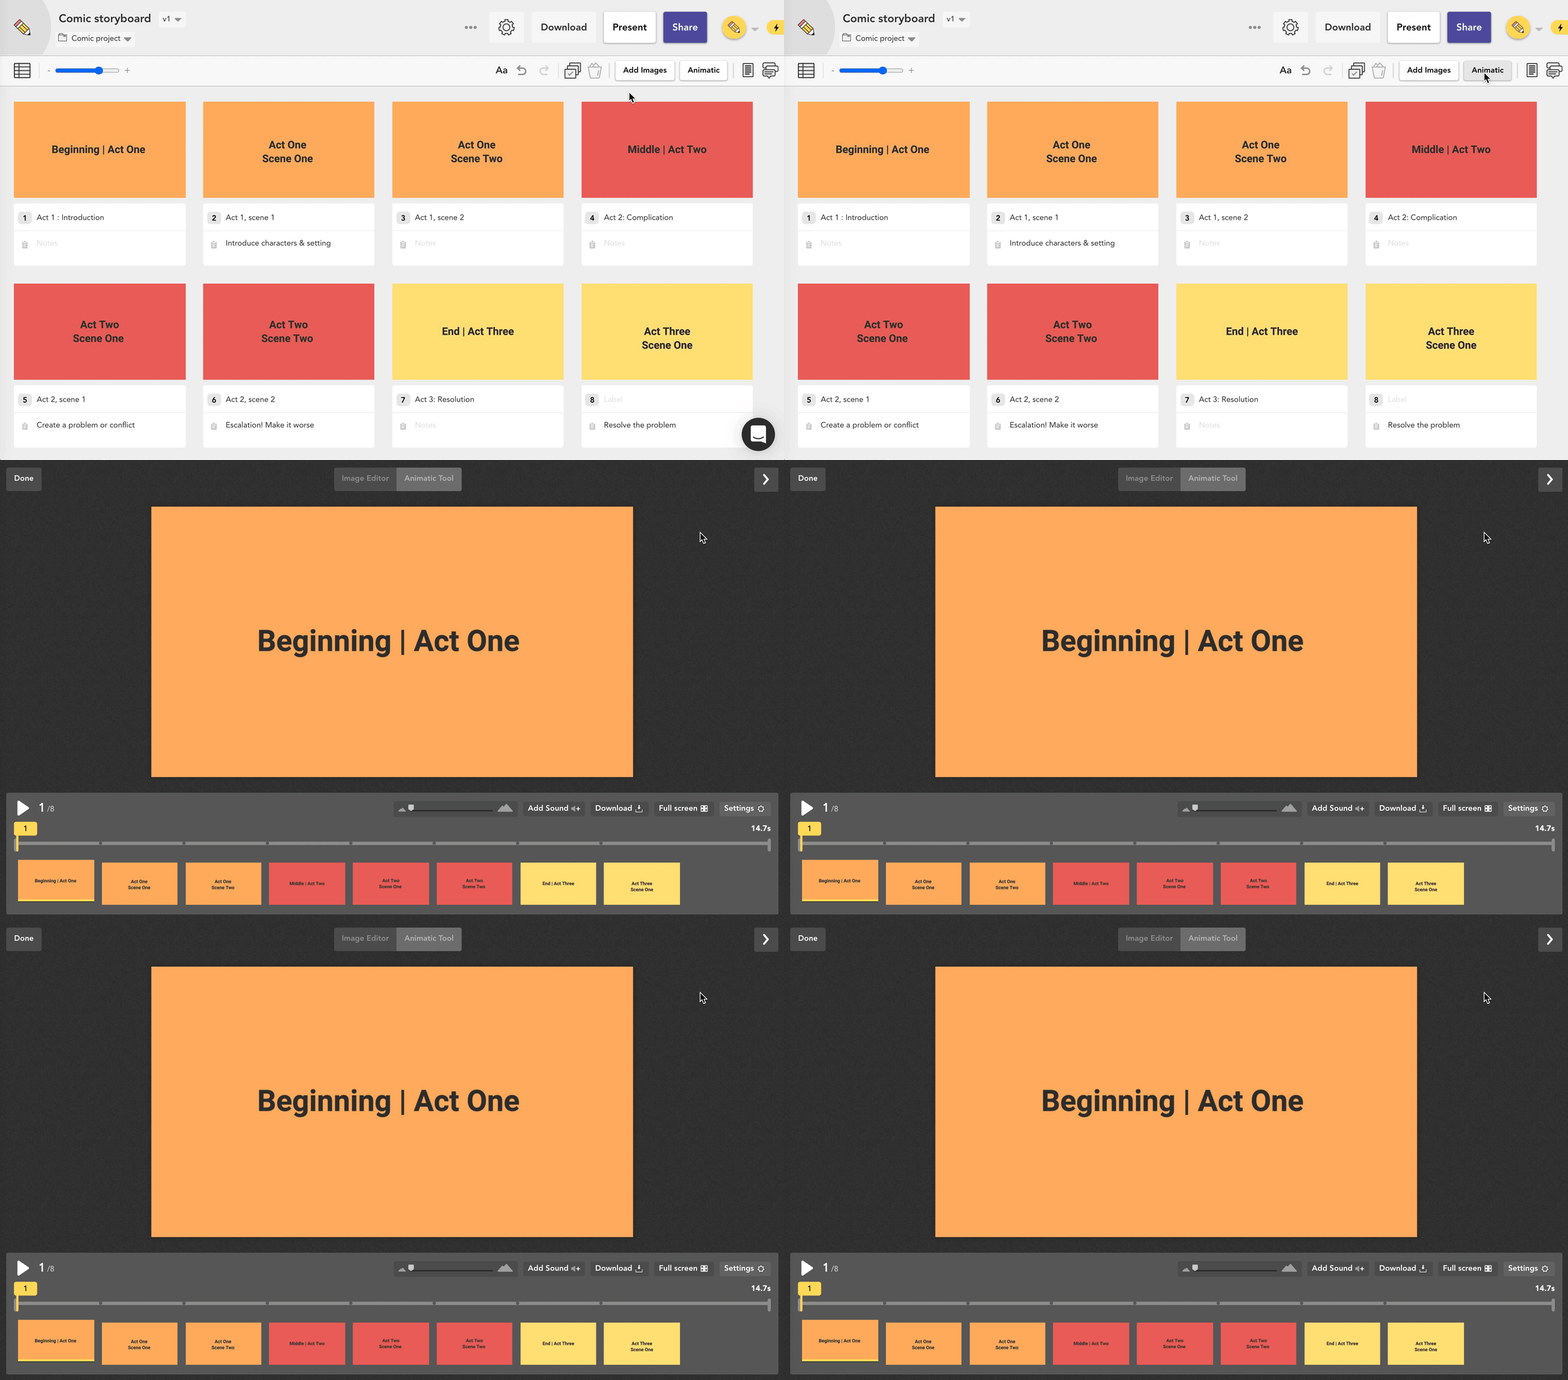
You might find it helpful to review the story in animatic form. Click Animatic to convert your images directly from storyboard format to an animatic.
Your animatic will be arranged into a timeline with the position of each frame marked by a grey dot. Easy.
8. Ask for feedback
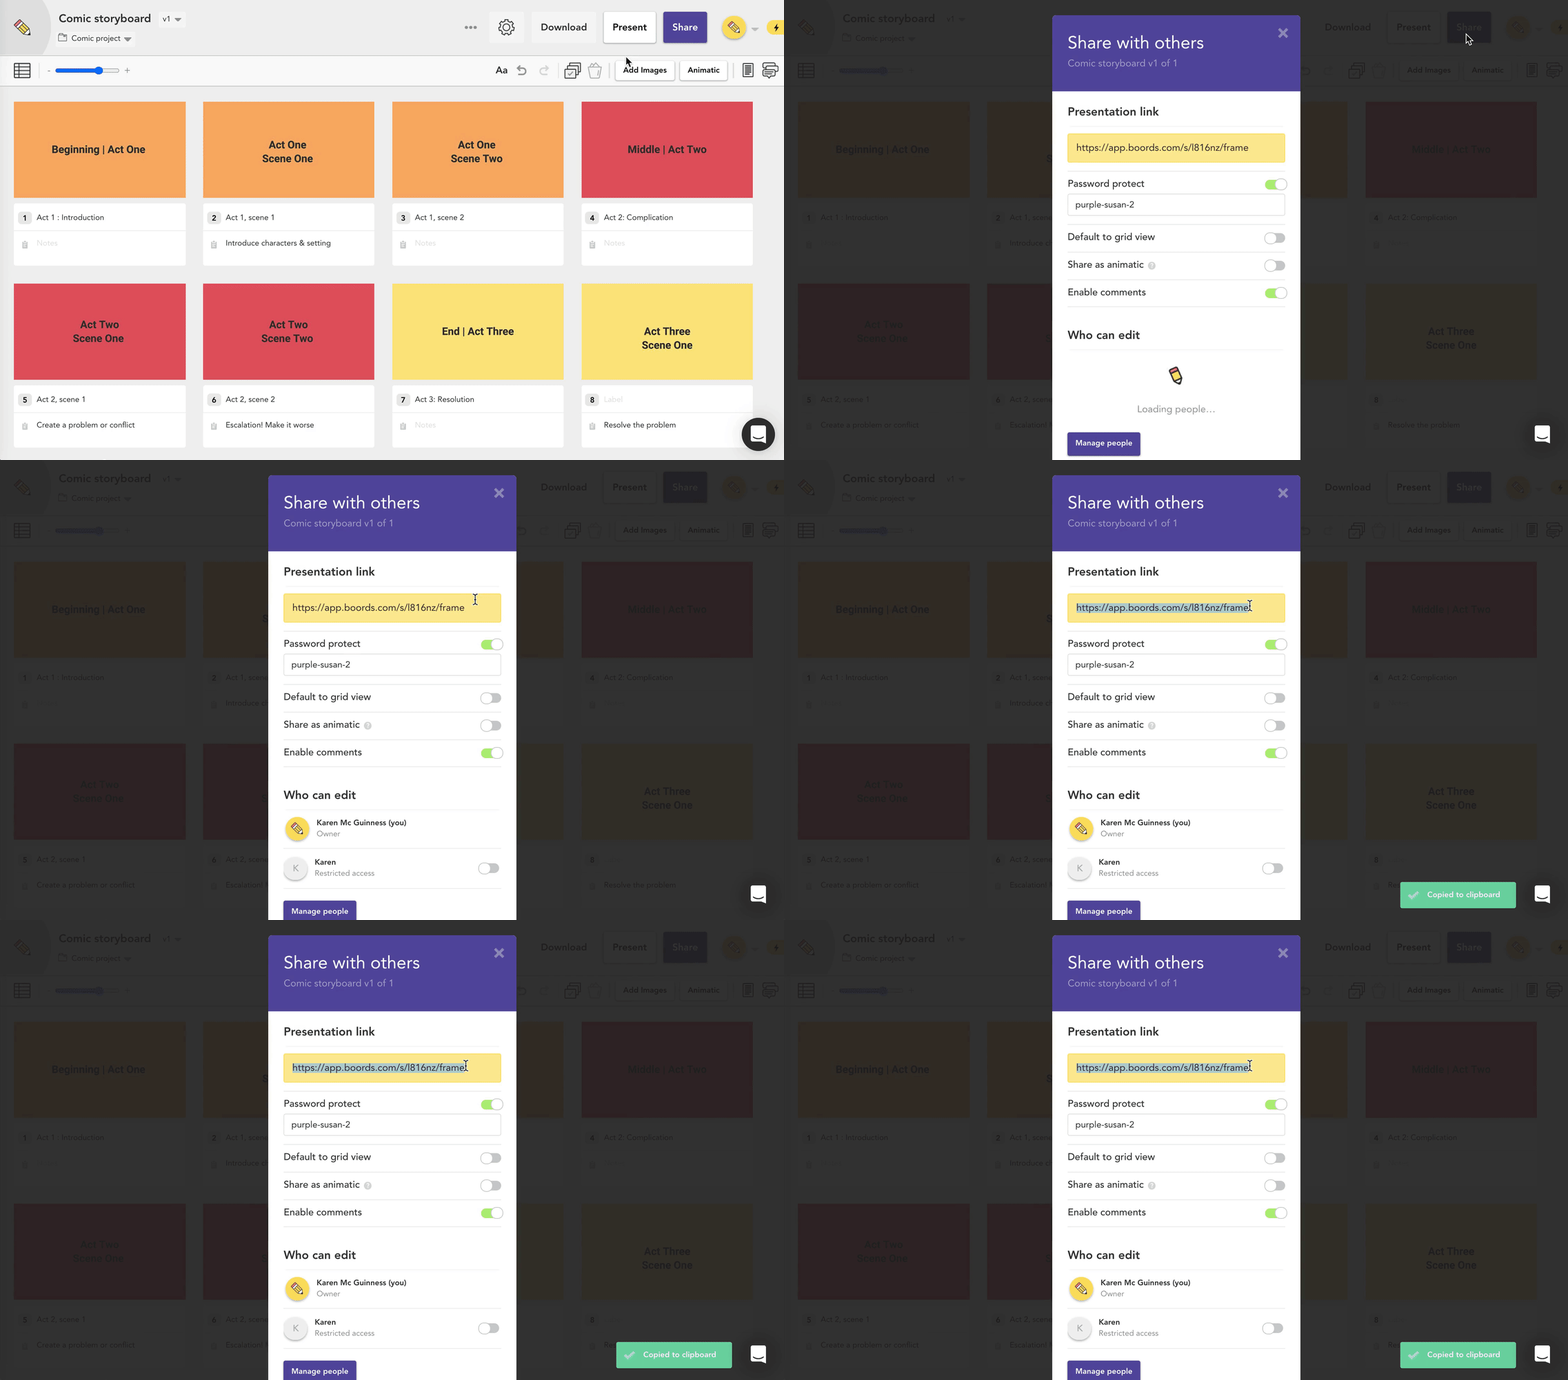
After you've drawn your storyboard, you can show it to other people for feedback.
- Click
Sharein the top right of the screen - Copy the presentation link
- Send the link to people for feedback
- Optional: click
Manage peopleto give people editing access
Get your FREE Filmmaking Storyboard Template Bundle
Plan your film with 10 professionally designed storyboard templates as ready-to-use PDFs.
What next?
We've got plenty more articles that can help with your comic book craft, whether you're starting out by self publishing or a seasoned pro. Have a sniff around our blog, or check out some suggestions below:
Try Boords today for free. And remember us when you're sitting on top of the bestseller lists.